

The majority of rental kitchens look like they were designed by someone who’s literally never cooked anything more complicated than instant ramen. The aesthetic is always beige everything, harsh fluorescent lighting, cabinet hardware that feels like it came from a 1990s office building. But you don’t have to live with it.
We’re going to look at five rental kitchen upgrades that work without touching anything permanent. No drilling into mystery walls, no ripping up flooring, no losing your security deposit. Just smart changes that make your landlord’s basic kitchen look like you hired an actual designer.
What Are The Best Ways To Upgrade A Rental Kitchen?
- Peel-and-Stick Backsplash: Modern versions look like real ceramic tiles, complete with texture and realistic grout lines that fool most people.
- Designer Hardware Swaps: Replace those plastic-feeling knobs with solid brass or matte black handles from CB2 or West Elm for around $6-12 each.
- Layered Wireless Lighting: Battery-powered LED strips under cabinets plus a plug-in pendant light eliminate that harsh overhead glare.
- Vinyl Countertop Film: High-quality architectural vinyl can make old laminate look like Carrara marble or butcher block for under $50 per roll.
- Smart Vertical Storage: Adhesive floating shelves and magnetic strips turn wall space into stylish display areas without damaging paint.
1. Can A Peel-And-Stick Backsplash Really Look Professional?

The backsplash situation in most rentals is seriously depressing. You’re either staring at bare drywall behind the sink, or there’s a tragic ceramic situation happening that makes the whole kitchen feel like a medical facility.
Modern peel-and-stick tiles are nothing like those flat stickers your mom used to have in the laundry room. StickTILE and Aspect Stone make versions with actual dimension. The subway tiles have beveled edges. The Moroccan patterns have raised surfaces that catch light exactly like real ceramic.
I’ve installed the StickTILE white subway in three different apartments now. People always assume it’s real unless they’re literally touching it. The secret is just preparation, which sounds boring but makes all the difference. Clean the wall with TSP or any degreasing cleaner first. Any grease film will make the tiles slide around or pop off later.
You want to start from the center and work your way outward. Use a metal ruler and a sharp utility knife for cuts around outlets. The vinyl is forgiving enough that small mistakes aren’t noticeable, but crisp edges around switches look intentional and professional.
Most brands are totally good with heat as long as you’re not sticking them directly behind a gas burner. Keep them at least six inches from direct flame. When you move out, hit them with a hair dryer for about 30 seconds and they’ll peel right off fairly easily. Usually without taking paint with them, but test a corner first if your landlord uses cheap paint.
The visual impact is immediate. Suddenly your kitchen has layers and texture instead of flat builder-grade walls. White subway makes small spaces feel bigger. Darker patterns like hexagon or moroccan add drama if your cabinets are light enough to handle it.
2. Why Should You Replace Your Builder-Grade Cabinet Hardware?
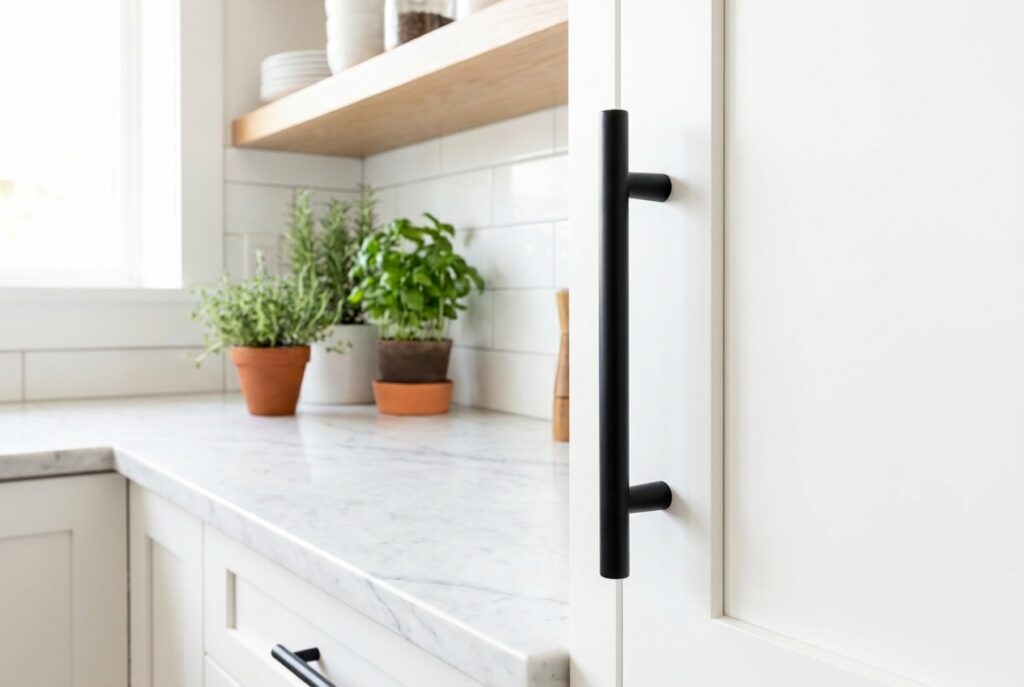
I tend to think of cabinet hardware as the “jewelry” of your kitchen, except most rental hardware feels like plastic costume jewelry from a gas station. Those basic chrome knobs or flat metal pulls scream “apartment complex circa 2003.”
Swapping them takes maybe an hour and transforms the entire feel of the space. Solid brass from Schoolhouse Electric runs about $8-15 per knob, but even the CB2 matte black options at $6 each feel solid and weighty in your hand. Weight matters more than you’d think.
Measure first, I beg of you. If you have knobs, any new knob will work since they use standard screws. Pulls are trickier since you need to match the center-to-center distance between screw holes. Most are either 3-inch or 5-inch spacing, but measure twice because drilling new holes isn’t really a great option.
Save ALL the original hardware in a labeled freezer bag. Stick it on a high shelf or in your bedroom closet. When you move, swap everything back and take your good hardware with you. I’ve moved my brass knobs from Rejuvenation through 2 different apartments now.
The upgrade works especially well in small kitchens because the hardware sits right at eye level. Whether you go modern with sleek steel bars or vintage with cup pulls, the consistency makes everything look more intentional. Less “whatever was cheapest at Home Depot,” more “I actually put thought in this.”
Matte black works with almost everything and photographs well if you’re the type to Instagram your coffee setup. Brass feels warmer but shows fingerprints more. Both are infinitely better than whatever came with the place.
3. What Lighting Tricks Create Rental Kitchen Upgrades That Look Expensive?
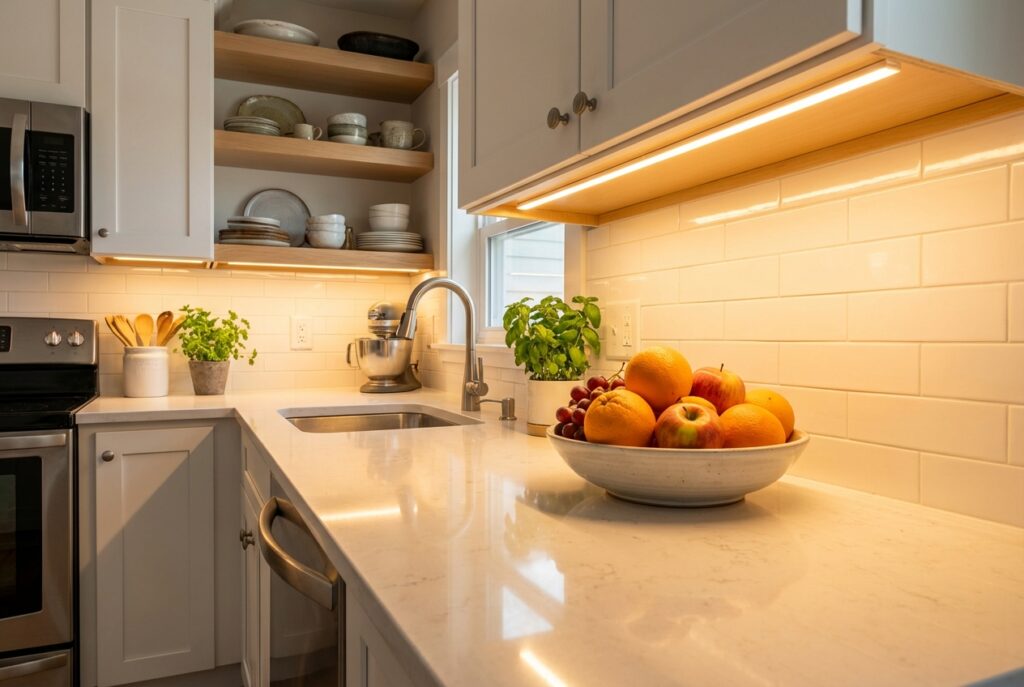
Rental kitchen lighting is usually one harsh overhead fixture that makes everything look like a crime scene. No warmth, deep shadows under cabinets, zero atmosphere. It’s one of the fastest way to tell you’re in a basic apartment instead of someone’s actual home.
Under-cabinet lighting changes everything. Those battery-powered LED strips from Brilliant Evolution or Wobane run about $25 for a three-pack and stick right to the underside of your upper cabinets. Look for “warm white” around 3000K to avoid that clinical blue-white hospital vibe.
The good wireless ones come with remote controls now. You can dim them, set timers, even change colors if you’re into that. Mounting takes five minutes per cabinet with the included adhesive strips. When the counters glow with warm light, the whole kitchen immediately feels more expensive.
Add a plug-in pendant light if you have an island or eat-in area. It might sound complicated but it’s honestly just about finding a fixture you love and running the cord to the nearest outlet. Use clear cord covers along the ceiling edge or Command strips to keep everything neat. A woven rattan pendant from World Market around $80 adds texture and makes the space feel curated instead of basic.
The combination eliminates those dark corners that make small kitchens feel cramped. You want task lighting where you actually work, and accent lighting to highlight whatever looks good. It’s the same layering principle expensive kitchens use, just with plug-in components instead of hardwired fixtures.
Your morning coffee routine will feel completely different under warm, layered lighting instead of that single overhead bulb. More like a cafe, less like a fluorescent-lit break room.
4. Can I Hide An Ugly Countertops With Removable Vinyl?
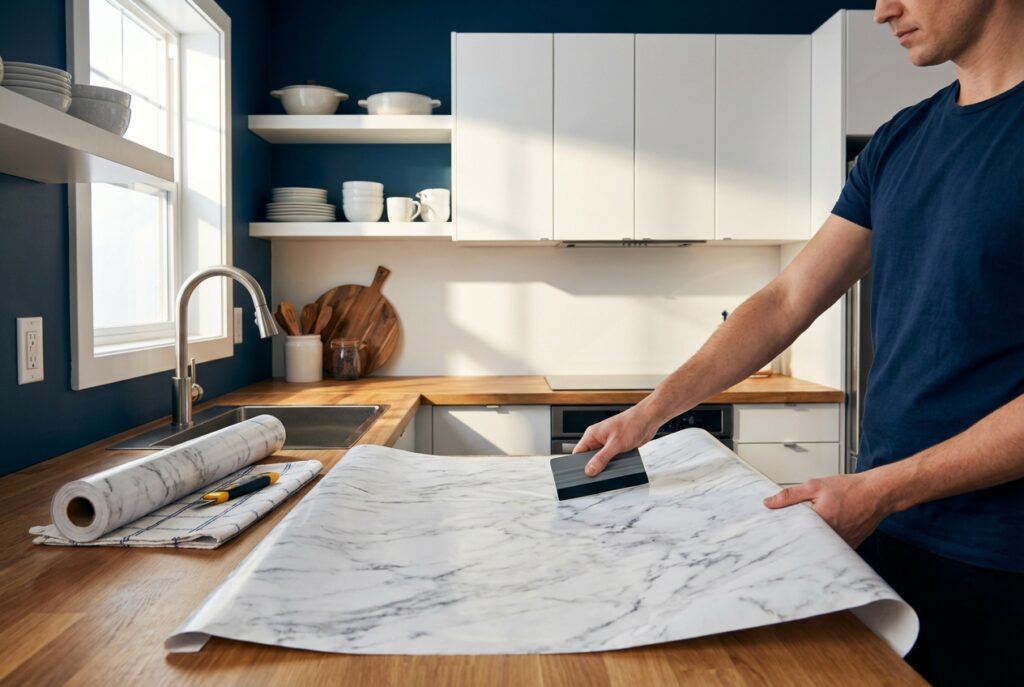
First, let’s just be direct – the answer is “yes”! Yes, you can hide that scratched laminate or that speckled pattern that was trendy approximately never. Vinyl countertop film might sound too good to be true, but it’s not. It’s not the thin contact paper your grandma used. Modern architectural vinyl from DC Fix or d-c-fix is thick, heat-resistant, and printed well enough to fool people from three feet away.
The marble patterns are surprisingly convincing. White Carrara marble vinyl makes any kitchen feel more expensive, especially if your cabinets are dark. Butcher block patterns add warmth without the maintenance of real wood. Even the concrete-look options photograph well for the Instagram crowd.
Application requires patience and clean surfaces. Any dust or crumb will show as a bump under the film. Use a squeegee or smoothing tool as you go, working from center outward to avoid air bubbles. The tricky part is getting clean edges around the sink and dealing with the rounded front edge of most counters.
A hair dryer helps the vinyl conform to curves and corners. Take your time with inside corners especially, since that’s where it tends to lift later if not properly adhered. The good stuff stays put for years but comes off clean when you heat it during removal.
The visual impact is dramatic. Light counters reflect more light around the room, making everything feel bigger. They provide contrast against dark cabinets or complement light ones without competing. Plus you’re actually protecting the landlord’s original counters from scratches and stains.
At around $40-60 for enough film to cover average counter space, it’s cheaper than one nice dinner out. And unlike that dinner, it’ll improve your daily life for the entire length of your lease. This approach to DIY kitchen renovation delivers maximum impact without the permanent commitment.
5. How Can You Maximize Storage While Adding Custom Style?
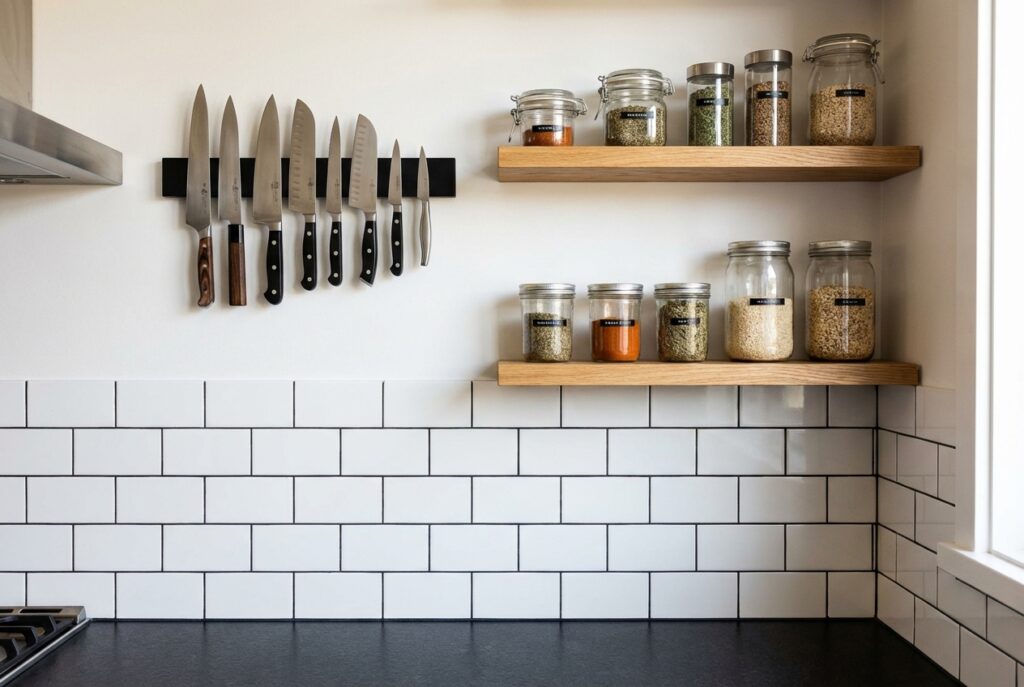
Small rental kitchens never have enough storage, and they’re always lacking in the personality department. Everything has to get shoved into dark cabinets where you can’t see it, and the walls stay completely bare and boring. You’re going to need to flex your creativity with storage solutions in a small kitchen.
Open storage fixes both issues. Floating shelves from IKEA’s LACK line are $10 each and hold surprising weight when properly mounted to their adhesive brackets. Use them to display your actual nice dishes instead of hiding them behind cabinet doors. Mason jars full of pasta or coffee beans look intentional, not just practical.
Magnetic strips on the side of the fridge or a blank wall segment hold knives, spice jars, even small utensils. The wooden ones from Williams Sonoma around $25 look more custom than the metal versions, though both work fine. Magnetic spice jars from Gneiss Spice let you see everything at a glance instead of digging through a cabinet.
Command strips can handle lightweight rails for hanging mugs or dish towels. The key is making it look intentional rather than random. Keep containers consistent – all glass jars with wooden lids, or all white ceramic, or all copper. Mixed styles can look cluttered.
Transfer bulk items into matching storage containers. Those OXO pop-top containers are expensive but photograph well and keep things fresh longer. Less expensive versions from Target’s Brightroom line work fine and maintain the clean, uniform look.
The goal is making your necessities look like decor choices. When storage becomes display, a small kitchen feels more organized and personal. These space optimization techniques work especially well for apartment kitchen improvements where every square inch counts. Less cramped apartment, more thoughtfully designed space that happens to be compact.
FAQ: Common Questions About Rental Kitchen Upgrades
Q: Do these temporary kitchen improvements damage the original surfaces?
A: Not if you use the right products and remove them properly. The adhesives on quality peel-and-stick materials are designed to hold firmly but release when heated. Always use a hair dryer during removal to soften the adhesive. For cabinet hardware, using existing screw holes means zero permanent changes. Test removal in an inconspicuous spot first, especially if you suspect cheap paint that might peel easily.
Q: How much do these DIY kitchen renovations typically cost?
A: A complete transformation runs $200-400 depending on kitchen size and material quality. High-end countertop vinyl costs around $50 per roll. Designer cabinet knobs range from $6-15 each. Under-cabinet LED strips run about $25 for a three-pack. Peel-and-stick backsplash tiles cost $30-80 depending on pattern and coverage area. Much less than a single month’s rent but with dramatic visual impact.
Q: Are peel-and-stick products safe to use near a stove or oven?
A: Modern versions are heat-resistant enough for normal kitchen use. Keep them at least 6-8 inches from direct flame or heating elements. The ambient heat from cooking won’t damage them, but direct contact with hot surfaces will. Most manufacturers test their products for kitchen environments, but common sense applies. Don’t stick them directly behind a gas range or next to a toaster oven. These budget-friendly kitchen updates handle everyday cooking heat without issues when properly installed.